#how to set up a localhost
Explore tagged Tumblr posts
Visit Tumblr Blog
Explore Tumblr blogs with no restrictions, modern design and the best experience.
Last Seen Tumblr Blogs


Fun Fact
The most popular pages on Tumblr are about Minecraft, GIFs, and David J. Peterson.
Text
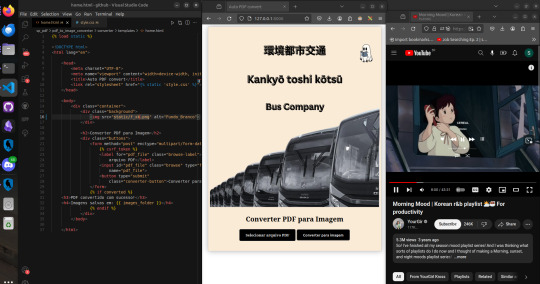
This one has an interesting story. It was in a place where we shared files through a shared data server locally (localhost only), so there was no network access to use the famous "I love PDF" or software like Adobe to convert and make some changes.
With that in mind, I used the PyPDF library to make a code that changes like converting, splitting, merging, and set it up on the server for people to use. Everyone loved both how the program worked and the crazy aesthetic that I made it and my boss approved. Well, problem solved! And fun too, I must say. And since this is a Studyblr, I have to mention how worthwhile it is to study a library you've never seen before but that seems to do everything you need at that moment. Putting a small project into practice, seeing how people react to it, then studying and improving it in a way that reflects your own growth. That was made with Django Web Framework.
#dark academia#dark art#dark aesthetic#study#study blog#studying#study motivation#study aesthetic#coding#python#django#programming#student life#programmer#software development#software#softwarengineer#softwareengineering#computerscience#studentlife#student#studyblr#studyblr community#screenshot#brazil#brasil
11 notes
·
View notes
Text
Obsidian And RTX AI PCs For Advanced Large Language Model

How to Utilize Obsidian‘s Generative AI Tools. Two plug-ins created by the community demonstrate how RTX AI PCs can support large language models for the next generation of app developers.
Obsidian Meaning
Obsidian is a note-taking and personal knowledge base program that works with Markdown files. Users may create internal linkages for notes using it, and they can see the relationships as a graph. It is intended to assist users in flexible, non-linearly structuring and organizing their ideas and information. Commercial licenses are available for purchase, however personal usage of the program is free.
Obsidian Features
Electron is the foundation of Obsidian. It is a cross-platform program that works on mobile operating systems like iOS and Android in addition to Windows, Linux, and macOS. The program does not have a web-based version. By installing plugins and themes, users may expand the functionality of Obsidian across all platforms by integrating it with other tools or adding new capabilities.
Obsidian distinguishes between community plugins, which are submitted by users and made available as open-source software via GitHub, and core plugins, which are made available and maintained by the Obsidian team. A calendar widget and a task board in the Kanban style are two examples of community plugins. The software comes with more than 200 community-made themes.
Every new note in Obsidian creates a new text document, and all of the documents are searchable inside the app. Obsidian works with a folder of text documents. Obsidian generates an interactive graph that illustrates the connections between notes and permits internal connectivity between notes. While Markdown is used to accomplish text formatting in Obsidian, Obsidian offers quick previewing of produced content.
Generative AI Tools In Obsidian
A group of AI aficionados is exploring with methods to incorporate the potent technology into standard productivity practices as generative AI develops and speeds up industry.
Community plug-in-supporting applications empower users to investigate the ways in which large language models (LLMs) might improve a range of activities. Users using RTX AI PCs may easily incorporate local LLMs by employing local inference servers that are powered by the NVIDIA RTX-accelerated llama.cpp software library.
It previously examined how consumers might maximize their online surfing experience by using Leo AI in the Brave web browser. Today, it examine Obsidian, a well-known writing and note-taking tool that uses the Markdown markup language and is helpful for managing intricate and connected records for many projects. Several of the community-developed plug-ins that add functionality to the app allow users to connect Obsidian to a local inferencing server, such as LM Studio or Ollama.
To connect Obsidian to LM Studio, just select the “Developer” button on the left panel, load any downloaded model, enable the CORS toggle, and click “Start.” This will enable LM Studio’s local server capabilities. Because the plug-ins will need this information to connect, make a note of the chat completion URL from the “Developer” log console (“http://localhost:1234/v1/chat/completions” by default).
Next, visit the “Settings” tab after launching Obsidian. After selecting “Community plug-ins,” choose “Browse.” Although there are a number of LLM-related community plug-ins, Text Generator and Smart Connections are two well-liked choices.
For creating notes and summaries on a study subject, for example, Text Generator is useful in an Obsidian vault.
Asking queries about the contents of an Obsidian vault, such the solution to a trivia question that was stored years ago, is made easier using Smart Connections.
Open the Text Generator settings, choose “Custom” under “Provider profile,” and then enter the whole URL in the “Endpoint” section. After turning on the plug-in, adjust the settings for Smart Connections. For the model platform, choose “Custom Local (OpenAI Format)” from the options panel on the right side of the screen. Next, as they appear in LM Studio, type the model name (for example, “gemma-2-27b-instruct”) and the URL into the corresponding fields.
The plug-ins will work when the fields are completed. If users are interested in what’s going on on the local server side, the LM Studio user interface will also display recorded activities.
Transforming Workflows With Obsidian AI Plug-Ins
Consider a scenario where a user want to organize a trip to the made-up city of Lunar City and come up with suggestions for things to do there. “What to Do in Lunar City” would be the title of the new note that the user would begin. A few more instructions must be included in the query submitted to the LLM in order to direct the results, since Lunar City is not an actual location. The model will create a list of things to do while traveling if you click the Text Generator plug-in button.
Obsidian will ask LM Studio to provide a response using the Text Generator plug-in, and LM Studio will then execute the Gemma 2 27B model. The model can rapidly provide a list of tasks if the user’s machine has RTX GPU acceleration.
Or let’s say that years later, the user’s buddy is visiting Lunar City and is looking for a place to dine. Although the user may not be able to recall the names of the restaurants they visited, they can review the notes in their vault Obsidian‘s word for a collection of notes to see whether they have any written notes.
A user may ask inquiries about their vault of notes and other material using the Smart Connections plug-in instead of going through all of the notes by hand. In order to help with the process, the plug-in retrieves pertinent information from the user’s notes and responds to the request using the same LM Studio server. The plug-in uses a method known as retrieval-augmented generation to do this.
Although these are entertaining examples, users may see the true advantages and enhancements in daily productivity after experimenting with these features for a while. Two examples of how community developers and AI fans are using AI to enhance their PC experiences are Obsidian plug-ins.
Thousands of open-source models are available for developers to include into their Windows programs using NVIDIA GeForce RTX technology.
Read more on Govindhtech.com
#Obsidian#RTXAIPCs#LLM#LargeLanguageModel#AI#GenerativeAI#NVIDIARTX#LMStudio#RTXGPU#News#Technews#Technology#Technologynews#Technologytrends#govindhtech
3 notes
·
View notes
Text
Ansible Collections: Extending Ansible’s Capabilities
Ansible is a powerful automation tool used for configuration management, application deployment, and task automation. One of the key features that enhances its flexibility and extensibility is the concept of Ansible Collections. In this blog post, we'll explore what Ansible Collections are, how to create and use them, and look at some popular collections and their use cases.
Introduction to Ansible Collections
Ansible Collections are a way to package and distribute Ansible content. This content can include playbooks, roles, modules, plugins, and more. Collections allow users to organize their Ansible content and share it more easily, making it simpler to maintain and reuse.
Key Features of Ansible Collections:
Modularity: Collections break down Ansible content into modular components that can be independently developed, tested, and maintained.
Distribution: Collections can be distributed via Ansible Galaxy or private repositories, enabling easy sharing within teams or the wider Ansible community.
Versioning: Collections support versioning, allowing users to specify and depend on specific versions of a collection. How to Create and Use Collections in Your Projects
Creating and using Ansible Collections involves a few key steps. Here’s a guide to get you started:
1. Setting Up Your Collection
To create a new collection, you can use the ansible-galaxy command-line tool:
ansible-galaxy collection init my_namespace.my_collection
This command sets up a basic directory structure for your collection:
my_namespace/
└── my_collection/
├── docs/
├── plugins/
│ ├── modules/
│ ├── inventory/
│ └── ...
├── roles/
├── playbooks/
├── README.md
└── galaxy.yml
2. Adding Content to Your Collection
Populate your collection with the necessary content. For example, you can add roles, modules, and plugins under the respective directories. Update the galaxy.yml file with metadata about your collection.
3. Building and Publishing Your Collection
Once your collection is ready, you can build it using the following command:
ansible-galaxy collection build
This command creates a tarball of your collection, which you can then publish to Ansible Galaxy or a private repository:
ansible-galaxy collection publish my_namespace-my_collection-1.0.0.tar.gz
4. Using Collections in Your Projects
To use a collection in your Ansible project, specify it in your requirements.yml file:
collections:
- name: my_namespace.my_collection
version: 1.0.0
Then, install the collection using:
ansible-galaxy collection install -r requirements.yml
You can now use the content from the collection in your playbooks:--- - name: Example Playbook hosts: localhost tasks: - name: Use a module from the collection my_namespace.my_collection.my_module: param: value
Popular Collections and Their Use Cases
Here are some popular Ansible Collections and how they can be used:
1. community.general
Description: A collection of modules, plugins, and roles that are not tied to any specific provider or technology.
Use Cases: General-purpose tasks like file manipulation, network configuration, and user management.
2. amazon.aws
Description: Provides modules and plugins for managing AWS resources.
Use Cases: Automating AWS infrastructure, such as EC2 instances, S3 buckets, and RDS databases.
3. ansible.posix
Description: A collection of modules for managing POSIX systems.
Use Cases: Tasks specific to Unix-like systems, such as managing users, groups, and file systems.
4. cisco.ios
Description: Contains modules and plugins for automating Cisco IOS devices.
Use Cases: Network automation for Cisco routers and switches, including configuration management and backup.
5. kubernetes.core
Description: Provides modules for managing Kubernetes resources.
Use Cases: Deploying and managing Kubernetes applications, services, and configurations.
Conclusion
Ansible Collections significantly enhance the modularity, distribution, and reusability of Ansible content. By understanding how to create and use collections, you can streamline your automation workflows and share your work with others more effectively. Explore popular collections to leverage existing solutions and extend Ansible’s capabilities in your projects.
For more details click www.qcsdclabs.com
#redhatcourses#information technology#linux#containerorchestration#container#kubernetes#containersecurity#docker#dockerswarm#aws
2 notes
·
View notes
Text
Certainly! Let’s explore how to build a full-stack application using Node.js. In this comprehensive guide, we’ll cover the essential components and steps involved in creating a full-stack web application.
Building a Full-Stack Application with Node.js, Express, and MongoDB
1. Node.js: The Backbone of Our Application
Node.js is a runtime environment that allows us to run JavaScript on the server-side.
It’s built on Chrome’s V8 JavaScript engine and uses an event-driven, non-blocking I/O model, making it lightweight and efficient.
Node.js serves as the backbone of our application, providing the environment in which our server-side code will run.
2. Express.js: Simplifying Server-Side Development
Express.js is a minimal and flexible Node.js web application framework.
It provides a robust set of features for building web and mobile applications.
With Express.js, we can:
Set up middlewares to respond to HTTP requests.
Define routing rules.
Add additional features like template engines.
3. MongoDB: Storing Our Data
MongoDB is a document-oriented database program.
It uses JSON-like documents with optional schemas and is known for its flexibility and scalability.
We’ll use MongoDB to store our application’s data in an accessible and writable format.
Building Our Full-Stack Application: A Step-by-Step Guide
Setting Up the Environment:
Install Node.js:sudo apt install nodejs
Initialize a new Node.js project:mkdir myapp && cd myapp npm init -y
Install Express.js:npm install express
Creating the Server:
Create a basic Express server:const express = require('express'); const app = express(); const port = 3000; app.get('/', (req, res) => { res.send('Hello World!'); }); app.listen(port, () => { console.log(`Server running at http://localhost:${port}`); });
Defining Routes:
Define routes for different parts of our application:app.get('/user', (req, res) => { res.send('User Page'); });
Connecting to MongoDB:
Use Mongoose (a MongoDB object modeling tool) to connect to MongoDB and handle data storage.
Remember, this is just the beginning! Full-stack development involves frontend (client-side) work as well. You can use React, Angular, or other frontend libraries to build the user interface and connect it to your backend (Node.js and Express).
Feel free to explore more about each component and dive deeper into building your full-stack application! 😊 12
2 notes
·
View notes
Text
How To Setup Elasticsearch 6.4 On RHEL/CentOS 6/7?

What is Elasticsearch? Elasticsearch is a search engine based on Lucene. It is useful in a distributed environment and helps in a multitenant-capable full-text search engine. While you query something from Elasticsearch it will provide you with an HTTP web interface and schema-free JSON documents. it provides the ability for full-text search. Elasticsearch is developed in Java and is released as open-source under the terms of the Apache 2 license. Scenario: 1. Server IP: 192.168.56.101 2. Elasticsearch: Version 6.4 3. OS: CentOS 7.5 4. RAM: 4 GB Note: If you are a SUDO user then prefix every command with sudo, like #sudo ifconfig With the help of this guide, you will be able to set up Elasticsearch single-node clusters on CentOS, Red Hat, and Fedora systems. Step 1: Install and Verify Java Java is the primary requirement for installing Elasticsearch. So, make sure you have Java installed on your system. # java -version openjdk version "1.8.0_181" OpenJDK Runtime Environment (build 1.8.0_181-b13) OpenJDK 64-Bit Server VM (build 25.181-b13, mixed mode) If you don’t have Java installed on your system, then run the below command # yum install java-1.8.0-openjdk Step 2: Setup Elasticsearch For this guide, I am downloading the latest Elasticsearch tar from its official website so follow the below step # wget https://artifacts.elastic.co/downloads/elasticsearch/elasticsearch-6.4.2.tar.gz # tar -xzf elasticsearch-6.4.2.tar.gz # tar -xzf elasticsearch-6.4.2.tar.gz # mv elasticsearch-6.4.2 /usr/local/elasticsearch Step 5: Permission and User We need a user for running elasticsearch (root is not recommended). # useradd elasticsearch # chown -R elasticsearch.elasticsearch /usr/local/elasticsearch/ Step 6: Setup Ulimits Now to get a Running system we need to make some changes of ulimits else we will get an error like “max number of threads for user is too low, increase to at least ” so to overcome this issue make below changes you should run. # ulimit -n 65536 # ulimit -u 2048 Or you may edit the file to make changes permanent # vim /etc/security/limits.conf elasticsearch - nofile 65536 elasticsearch soft nofile 64000 elasticsearch hard nofile 64000 elasticsearch hard nproc 4096 elasticsearch soft nproc 4096 Save files using :wq Step 7: Configure Elasticsearch Now make some configuration changes like cluster name or node name to make our single node cluster live. # cd /usr/local/elasticsearch/ Now, look for the below keywords in the file and change according to you need # vim conf/elasticsearch.yml cluster.name: kapendra-cluster-1 node.name: kapendra-node-1 http.port: 9200 to set this value to your IP or make it 0.0.0.0 ID needs to be accessible from anywhere from the network. Else put your IP of localhost network.host: 0.0.0.0 There is one more thing if you have any dedicated mount pint for data then change the value for #path.data: /path/to/data to your mount point.
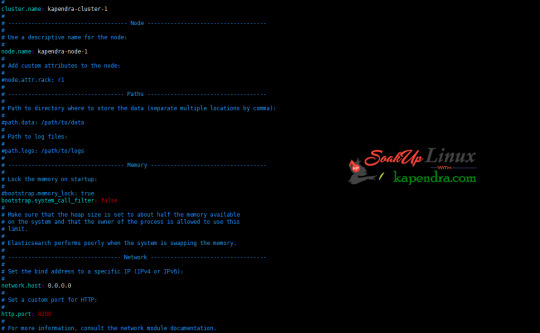
Your configuration should look like the above. Step 8: Starting Elasticsearch Cluster As the Elasticsearch setup is completed. Let the start Elasticsearch cluster with elastic search user so first switch to elastic search user and then run the cluster # su - elasticsearch $ /usr/local/elasticsearch/bin/elasticsearch 22278 Step 9: Verify Setup You have all done it, just need to verify the setup. Elasticsearch works on port default port 9200, open your browser to point your server on port 9200, You will find something like the below output http://localhost:9200 or http://192.168.56.101:9200 at the end of this article, you have successfully set up Elasticsearch single node cluster. In the next few articles, we will try to cover a few commands and their setup in the docker container for development environments on local machines. Read the full article
2 notes
·
View notes
Text
How to Integrate Newgrounds Medals with Construct 3 (PixelPerfect NewgroundsIO API Plugin Method)
After several attempts and a lot of troubleshooting, I’ve finally figured out how to successfully integrate NGIO plugin with Construct 3 to enable Newgrounds medals in my game. I’m writing this tutorial mainly for my own reference, so I’ll have a clear step-by-step guide the next time I want to integrate medals (or other Newgrounds features) into another project. Right now, this covers just the medal setup—when I try out things like scoreboards or cloud saves, I’ll come back and update this with anything important I learn.
1. Newgrounds Account and Project Setup
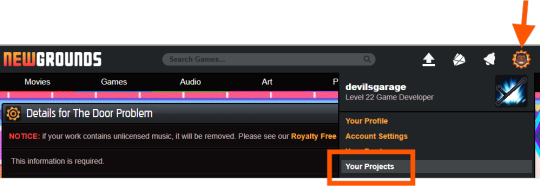

Register or log in at newgrounds.com.
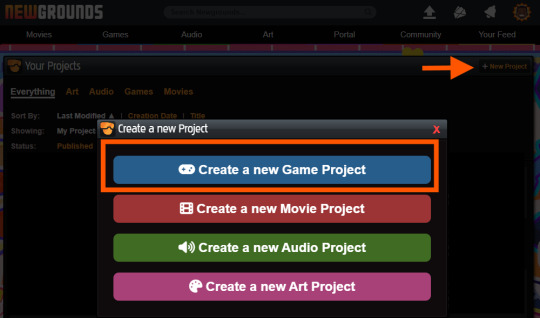
Visit Newgrounds Projects.
Create a new project and fill in the required information.
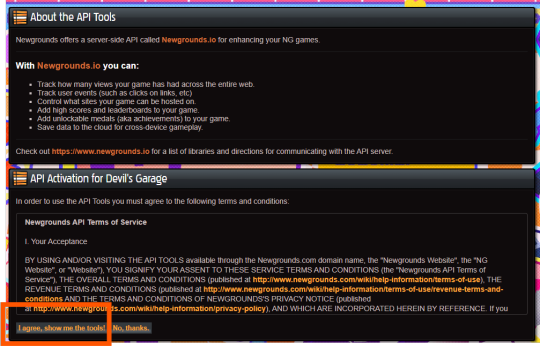
Scroll all the way down to the footer navigation and click API Tools.
After agreeing to the API activation, click “I agree, show me the tools!” to access the Newgrounds.io dashboard.
In the dashboard, locate your App ID and Encryption Key (copy these for the plugin), as well as Medal/Scoreboard/Cloud Save setup and other API tools.
Create medals on the Newgrounds project page. After creating each one, note its numeric ID for use in the plugin.
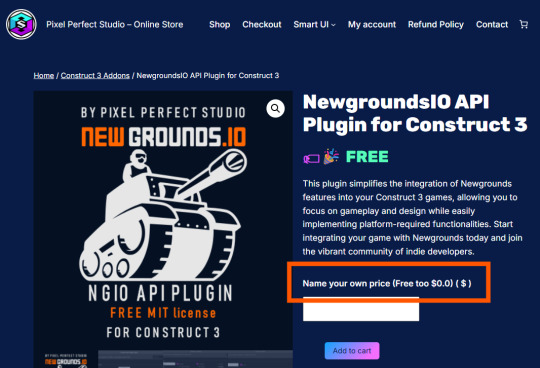
2. Downloading the Plugin
Download the Newgrounds.io plugin from Pixel Perfect Studio.
In Construct 3, go to Menu → Addons → Import Addon, then select the downloaded file.
Add a Newgrounds.io object to your project layout.
When exporting for publishing, ensure the entire exported folder (with all files and plugins) is uploaded to Newgrounds.
3. Setting Up the Construct 3 Project and Plugin Details
Start a new Construct 3 project (or use an existing one).
Check project properties such as viewport size, layout order, and loader style.
Select the Newgrounds.io object in your layout, then enter the App ID and Encryption Key exactly as shown in your Newgrounds API Tools page (no extra spaces or characters).
Set up an event to trigger NGIO login after player input (for example, “Press Any Key” on an intro/title screen). Login should not be called on “Start of Layout,” as browsers may block popups unless triggered by user action.
To unlock a medal during gameplay (such as on player death), use the plugin’s “Unlock medal” action and enter only the numeric Medal ID (not “ID#”).
4. Dos and Don’ts for Publishing the Project
Always export as “HTML5 Website” and upload every file to Newgrounds.
In export options, set Minify Mode to Simple. Using “Advanced” minification can break plugin code and prevent medals or NGIO features from working.
Double-check App ID and AES key for typos—these must match exactly or API communication will fail.
Test only on Newgrounds.com (not localhost or other hosts); medals and login require correct domain and project configuration.
Ignore the “Apps with Access” section unless specifically sharing medals or leaderboards between multiple App IDs or projects.
0 notes
Text
Start Coding Today: Learn React JS for Beginners

Start Coding Today: Learn React JS for Beginners”—will give you a solid foundation and guide you step by step toward becoming a confident React developer.
React JS, developed by Facebook, is an open-source JavaScript library used to build user interfaces, especially for single-page applications (SPAs). Unlike traditional JavaScript or jQuery, React follows a component-based architecture, making the code easier to manage, scale, and debug. With React, you can break complex UIs into small, reusable pieces called components.
Why Learn React JS?
Before diving into the how-to, let’s understand why learning React JS is a smart choice for beginners:
High Demand: React developers are in high demand in tech companies worldwide.
Easy to Learn: If you know basic HTML, CSS, and JavaScript, you can quickly get started with React.
Reusable Components: Build and reuse UI blocks easily across your project.
Strong Community Support: Tons of tutorials, open-source tools, and documentation are available.
Backed by Facebook: React is regularly updated and widely used in real-world applications (Facebook, Instagram, Netflix, Airbnb).
Prerequisites Before You Start
React is based on JavaScript, so a beginner should have:
Basic knowledge of HTML and CSS
Familiarity with JavaScript fundamentals such as variables, functions, arrays, and objects
Understanding of ES6+ features like let, const, arrow functions, destructuring, and modules
Don’t worry if you’re not perfect at JavaScript yet. You can still start learning React and improve your skills as you go.
Setting Up the React Development Environment
There are a few ways to set up your React project, but the easiest way for beginners is using Create React App, a boilerplate provided by the React team.
Step 1: Install Node.js and npm
Download and install Node.js from https://nodejs.org. npm (Node Package Manager) comes bundled with it.
Step 2: Install Create React App
Open your terminal or command prompt and run:
create-react-app my-first-react-app
This command creates a new folder with all the necessary files and dependencies.
Step 3: Start the Development Server
Navigate to your app folder:
my-first-react-app
Then start the app:
Your first React application will launch in your browser at http://localhost:3000.
Understanding the Basics of React
Now that you have your environment set up, let’s understand key React concepts:
1. Components
React apps are made up of components. Each component is a JavaScript function or class that returns HTML (JSX).
function Welcome() { return <h1>Hello, React Beginner!</h1>; }
2. JSX (JavaScript XML)
JSX lets you write HTML inside JavaScript. It’s not mandatory, but it makes code easier to write and understand.
const element = <h1>Hello, World!</h1>;
3. Props
Props (short for properties) allow you to pass data from one component to another.
function Welcome(props) { return <h1>Hello, {props.name}</h1>; }
4. State
State lets you track and manage data within a component.
import React, { useState } from 'react'; function Counter() { const [count, setCount] = useState(0); return ( <div> <p>You clicked {count} times.</p> <button onClick={() => setCount(count + 1)}>Click me</button> </div> ); }
Building Your First React App
Let’s create a simple React app — a counter.
Open the App.js file.
Replace the existing code with the following:
import React, { useState } from 'react'; function App() { const [count, setCount] = useState(0); return ( <div style={{ textAlign: 'center', marginTop: '50px' }}> <h1>Simple Counter App</h1> <p>You clicked {count} times</p> <button onClick={() => setCount(count + 1)}>Click Me</button> </div> ); } export default App;
Save the file, and see your app live on the browser.
Congratulations—you’ve just built your first interactive React app!
Where to Go Next?
After mastering the basics, explore the following:
React Router: For navigation between pages
useEffect Hook: For side effects like API calls
Forms and Input Handling
API Integration using fetch or axios
Styling (CSS Modules, Styled Components, Tailwind CSS)
Context API or Redux for state management
Deploying your app on platforms like Netlify or Vercel
Practice Projects for Beginners
Here are some simple projects to strengthen your skills:
Todo App
Weather App using an API
Digital Clock
Calculator
Random Quote Generator
These will help you apply the concepts you've learned and build your portfolio.
Final Thoughts
This “Start Coding Today: Learn React JS for Beginners” guide is your entry point into the world of modern web development. React is beginner-friendly yet powerful enough to build complex applications. With practice, patience, and curiosity, you'll move from writing your first “Hello, World!” to deploying full-featured web apps.
Remember, the best way to learn is by doing. Start small, build projects, read documentation, and keep experimenting. The world of React is vast and exciting—start coding today, and you’ll be amazed by what you can create!
0 notes
Text
Installing and Configuring TYPO3 on Docker Made Simple
Decided on TYPO3? Good call! It’s known for being flexible and scalable. But setting it up? Yeah, it can feel a bit old-fashioned. No stress—Docker’s got your back.

Why Choose Docker for TYPO3?
Docker offers several benefits:
Provides the same environment across all machines.
Makes TYPO3 installation fast and easy.
Keeps TYPO3 and its dependencies separate from your main system to avoid conflicts.
Supports team collaboration with consistent setups.
Simplifies testing and deploying TYPO3 projects.
How TYPO3 Runs in Docker Containers
TYPO3 needs a web server, PHP, and a database to function. Docker runs each of these as separate containers:
Web server container: Usually Apache or NGINX.
PHP container: Runs the TYPO3 PHP code.
Database container: Uses MySQL or MariaDB to store content.
These containers work together to run TYPO3 smoothly.
Getting Started: Installing TYPO3 with Docker
Install Docker on your device (Docker Desktop for Windows/macOS or Docker Engine for Linux).
Prepare a Docker Compose file that defines TYPO3’s web server, PHP, and database containers.
Run docker-compose up to launch all containers. Docker will download the necessary images and start your TYPO3 site.
Access your TYPO3 website through your browser, usually at localhost.
Benefits of Using Docker for TYPO3
Fast setup with just a few commands.
Easy to upgrade TYPO3 or PHP by changing container versions.
Portable across different machines and systems.
Keeps TYPO3 isolated from your computer’s main environment.
Who Should Use Docker for TYPO3?
Docker is ideal for developers, teams, and anyone wanting a consistent TYPO3 setup. It’s also helpful for testing TYPO3 or deploying projects in a simple, reproducible way.
Conclusion
Using Docker for TYPO3 simplifies setup and management by packaging everything TYPO3 needs. It saves time, avoids conflicts, and makes development smoother.
If you want more detailed help or specific instructions for your system, just let me know!
0 notes
Text
Perfex CRM Nulled php Script 3.2.1

Download Perfex CRM Nulled PHP Script for Free – Empower Your Business Looking to supercharge your business operations with a full-featured client relationship management system? Perfex CRM nulled php Script is the perfect solution for startups, agencies, freelancers, and small to mid-sized companies. This dynamic CRM platform helps you manage customers, projects, invoices, and much more—all under one powerful dashboard. And the best part? You can download it for free right here on our website. What is Perfex CRM Nulled PHP Script? Perfex CRM is a high-performance customer relationship management solution developed using CodeIgniter framework. It’s widely recognized for its intuitive interface, feature-rich environment, and flexibility. Whether you’re looking to automate billing, manage leads, or streamline project workflows, Perfex CRM delivers an exceptional experience without the hefty price tag. Why Choose Perfex CRM Nulled PHP Script? By downloading the Perfex CRM nulled php Script, you gain unrestricted access to premium features at no cost. This nulled version has been unlocked to provide complete freedom over your CRM system. Perfect for testing, development, or full business deployment, it’s a game-changer for those who seek high functionality without premium licensing costs. Technical Specifications Script Type: PHP (CodeIgniter Framework) Database: MySQL File Size: ~120 MB Version: Latest updated version License: Nulled (no license key required) Outstanding Features and Benefits Project Management with Milestones and Tasks Automated Invoice and Billing System Lead Management and Conversion Tracking Client Portal for Better Communication Fully Customizable Dashboards Multi-language and RTL Support Advanced Reporting and Analytics Professional Proposal Templates Email & SMS Integration for Notifications Real-World Use Cases Businesses across various industries trust Perfex CRM nulled php Script for daily operations: Digital Agencies: Seamlessly manage client tasks, campaigns, and deadlines. Freelancers: Stay organized with invoices, projects, and client communication in one place. Startups: Leverage a cost-free CRM that scales as you grow. Consultants: Track billable hours and generate custom reports with ease. How to Install Perfex CRM Nulled PHP Script Download the zip file from our website. Extract the contents to your web hosting server or localhost environment. Create a new MySQL database and import the included SQL file. Set up the configuration file with your database details. Access the installation wizard and follow on-screen instructions. Within minutes, you’ll be ready to launch your CRM portal and start managing your business like a pro. Frequently Asked Questions (FAQs) Is this the full version of Perfex CRM? Yes. The Perfex CRM is a complete, unrestricted version featuring all modules and tools available in the original paid script. Do I need a license key to activate it? No license key is required. The script has been pre-modified to work without activation. Can I use it for client projects? Yes. Many developers use nulled scripts for client demos and internal projects. However, for production and compliance, always consider purchasing the original license. Is it safe to use? Our uploaded files are thoroughly scanned and verified. Still, it's recommended to test in a local or staging environment first. Download Now – Start Managing Smarter There’s never been a better time to empower your team and streamline operations. The Perfex CRM nulled php Script offers an enterprise-grade CRM experience—without the enterprise costs. Download it now and explore all the tools you need to elevate your business. Looking for more tools? Don’t forget to check out elementor nulled pro to enhance your WordPress design capabilities. And if you're working with sliders or need stunning visual effects, Slider Revolution NULLED is an excellent addition to your toolkit.
0 notes
Video
youtube
The ABSOLUTE BEST Way to Install WordPress on XAMPP in 8 Minutes
🎥📢 Want to set up WordPress on your own computer? Then this video is for you! 💻🔥
In this tutorial, I’ve shown how to easily install WordPress on localhost using XAMPP. Start practicing web development from the comfort of your home! 🚀
👇 Watch the video now and don’t forget to share!
1 note
·
View note
Text
Choose the Right Web Hosting
Thinking of switching web hosting providers but worried about losing your website or breaking something important? You're not alone. Many website owners hesitate to make the move because they’re unsure about how the process works. But the truth is, with the right steps, you can move your website to a new host safely and easily — even as a beginner.
In this guide, we’ll walk you through a simple and safe way to transfer your website, while also helping you choose the right web hosting for long-term success. If you ever need quick assistance, feel free to call +91 9818 62 9898.
Why People Change Web Hosting Providers
Before we dive into the steps, let’s understand why someone might need to move their website:
Slow website performance
Frequent downtime or server issues
Poor customer support
Limited features or outdated technology
High renewal costs
If any of these issues sound familiar, it’s a clear sign that you need to move on and choose the right web hosting provider. For expert help during the switch, call us directly at +91 9818 62 9898.
Pre-Move Checklist: What You Need to Prepare
To ensure a smooth transfer, gather the following:
Access to your current hosting account
Access to your domain registrar
A backup of your website files and database
Login credentials for your new hosting provider
Some time (ideally during non-peak hours)
If you get stuck at any point, just dial +91 9818 62 9898 — our team is here to help.
Step-by-Step Guide to Move Your Website Safely
Step 1: Choose the Right Web Hosting Provider
The first and most important step is to choose the right web hosting for your current and future website needs. Look for:
99.9% uptime guarantee
High server speed
Free migration services
24/7 support
User-friendly dashboard
Not sure which provider is right for you? Get a quick recommendation by calling +91 9818 62 9898.
Step 2: Backup Your Website Files and Database
Always create a full backup before migrating.
For WordPress: Use plugins like All-in-One WP Migration or Duplicator to back up both files and database.
For non-WordPress sites: Download your files via FTP and export your database using phpMyAdmin.
Need help taking a backup? Reach out at +91 9818 62 9898.
Step 3: Upload Files to the New Host
Once your new host is ready, it’s time to upload:
WordPress Users:
Install WordPress on the new host
Import the backup using your chosen plugin
Non-WordPress Sites:
Upload via FTP
Recreate the database and import your .sql file
For technical support, don’t hesitate to call +91 9818 62 9898.
Step 4: Update Database Settings
If your website is database-driven (like WordPress), update the config file with new database credentials.
For WordPress, modify wp-config.php with:
sql
CopyEdit
define('DB_NAME', 'new_db_name'); define('DB_USER', 'new_db_user'); define('DB_PASSWORD', 'new_db_password'); define('DB_HOST', 'localhost');
Not sure where to find these details? We’re one call away at +91 9818 62 9898.
Step 5: Preview the Website on New Host
Before changing your domain settings, preview your site using:
A temporary URL (provided by your new host)
Hosts file modification (advanced users)
Ensure everything works — images load, forms submit, pages function properly. If you see issues, give us a call at +91 9818 62 9898 for quick troubleshooting.
Step 6: Change Domain DNS Settings
Now it’s time to go live.
Log in to your domain registrar
Update the DNS (nameservers) to your new host’s settings
Wait for DNS propagation (can take 24–48 hours)
During this period, avoid editing the website. If you're unsure how to do this, call +91 9818 62 9898 and we’ll walk you through it.
Step 7: Test After DNS Propagation
After DNS has updated, test your site:
Load pages
Test forms
Check mobile responsiveness
Verify email services (if connected to domain)
Pro Tips for a Smooth Migration
Migrate during low-traffic hours
Inform your visitors if there will be downtime
Keep your old host active for at least a week
Clear browser and site cache after the move
Always double-check backups
Need guidance through any of these steps? Talk to our web experts at +91 9818 62 9898.
Final Thoughts
Switching your hosting might feel scary, but it’s easier than it looks — especially when you follow the right steps. The key is to be prepared, follow a structured process, and above all, choose the right web hosting that meets your performance and support expectations.
Whether you're unhappy with your current provider or just want to upgrade, now is the perfect time to make the move. And if you ever feel stuck, don’t worry — just call +91 9818 62 9898, and we’ll guide you every step of the way.
Want expert help with your hosting migration? Call us now at +91 9818 62 9898 and get started without stress.
0 notes
Text
Backend Web Development Using Node.js

Node.js has revolutionized web development by enabling developers to write server-side code using JavaScript. If you're already comfortable with JavaScript on the frontend, transitioning to backend development with Node.js is a logical next step. In this post, we'll introduce the fundamentals of backend development using Node.js and how to build scalable, efficient web applications.
What is Node.js?
Node.js is a JavaScript runtime built on Chrome’s V8 engine. It allows developers to use JavaScript to write backend code, run scripts outside the browser, and build powerful network applications. Node.js is known for its non-blocking, event-driven architecture, making it highly efficient for I/O-heavy applications.
Why Use Node.js for Backend Development?
JavaScript Everywhere: Use a single language for both frontend and backend.
Asynchronous and Non-blocking: Great for handling many connections at once.
Vast Ecosystem: Thousands of modules available via npm (Node Package Manager).
Scalability: Ideal for microservices and real-time applications like chats or games.
Setting Up a Node.js Project
Install Node.js from nodejs.org
Create a new project folder:
Initialize the project:
Create your main file:
Basic Server Example
const http = require('http'); const server = http.createServer((req, res) => { res.writeHead(200, {'Content-Type': 'text/plain'}); res.end('Hello, Node.js Backend!'); }); server.listen(3000, () => { console.log('Server running on http://localhost:3000'); });
Using Express.js for Easier Development
Express.js is a popular web framework for Node.js that simplifies routing and middleware management.npm install express const express = require('express'); const app = express(); app.get('/', (req, res) => { res.send('Welcome to the Node.js backend!'); }); app.listen(3000, () => { console.log('Express server running on http://localhost:3000'); });
Common Backend Tasks with Node.js
Handle routing and API endpoints
Connect to databases (MongoDB, PostgreSQL, etc.)
Manage user authentication and sessions
Process form data and JSON
Serve static files
Popular Libraries and Tools
Express.js: Web framework
Mongoose: MongoDB object modeling
dotenv: Environment variable management
JWT: JSON Web Tokens for authentication
Nodemon: Auto-restart server on code changes
Best Practices
Use environment variables for sensitive data
Structure your project using MVC or service-based architecture
Use middleware for error handling and logging
Validate and sanitize user input
Secure your APIs with authentication and rate-limiting
Conclusion
Node.js is a powerful and flexible choice for backend development. Its ability to use JavaScript on the server-side, combined with a rich ecosystem of libraries, makes it ideal for building modern web applications. Start small, experiment with Express, and gradually add more features to build robust backend services.
0 notes
Text
How to Set Up Your First React Project: A Step-by-Step Guide
Among the most popular JavaScript libraries for building dynamic and interactive user interfaces is React. If you're new to React and want to get started, this step-by-step guide will help you set up your first React project effortlessly. If you're looking for expert training, consider the best React training institute in Hyderabad, Monopoly IT Solutions .
Step 1: Install Node.js and npm
Install Node.js on your computer before you begin. Node.js comes with npm (Node Package Manager), which is essential for managing React dependencies. Download and install it from nodejs.org.
Step 2: Install Create React App
Create React App (CRA) is the easiest way to set up a new React project. Run the following command at your terminal or command prompt:
npx create-react-app my-app
This will create a new folder named my-app with all the necessary dependencies.
Step 3: Navigate to Your Project Directory
Once the installation is complete, move into the newly created project folder:
cd my-app
Step 4: Start the Development Server
Run the following command to launch your React application:
npm start
This will start the development server, and you can view your project in the browser at http://localhost:3000/.
Step 5: Explore and Modify Code
Open the project folder in a code editor like VS Code and start exploring the src directory. Modify the App.js file to see your changes reflect in real-time.
Conclusion
Setting up a React project is simple and straightforward. To master React and advance your career, enroll in courses at the best React training institute in Hyderabad, Monopoly IT Solutions. Start your journey toward becoming a React expert today!
0 notes
Text
Automated Visual Regression Testing With Playwright
New Post has been published on https://thedigitalinsider.com/automated-visual-regression-testing-with-playwright/
Automated Visual Regression Testing With Playwright
Comparing visual artifacts can be a powerful, if fickle, approach to automated testing. Playwright makes this seem simple for websites, but the details might take a little finessing.
Recent downtime prompted me to scratch an itch that had been plaguing me for a while: The style sheet of a website I maintain has grown just a little unwieldy as we’ve been adding code while exploring new features. Now that we have a better idea of the requirements, it’s time for internal CSS refactoring to pay down some of our technical debt, taking advantage of modern CSS features (like using CSS nesting for more obvious structure). More importantly, a cleaner foundation should make it easier to introduce that dark mode feature we’re sorely lacking so we can finally respect users’ preferred color scheme.
However, being of the apprehensive persuasion, I was reluctant to make large changes for fear of unwittingly introducing bugs. I needed something to guard against visual regressions while refactoring — except that means snapshot testing, which is notoriously slow and brittle.
In this context, snapshot testing means taking screenshots to establish a reliable baseline against which we can compare future results. As we’ll see, those artifacts are influenced by a multitude of factors that might not always be fully controllable (e.g. timing, variable hardware resources, or randomized content). We also have to maintain state between test runs, i.e. save those screenshots, which complicates the setup and means our test code alone doesn’t fully describe expectations.
Having procrastinated without a more agreeable solution revealing itself, I finally set out to create what I assumed would be a quick spike. After all, this wouldn’t be part of the regular test suite; just a one-off utility for this particular refactoring task.
Fortunately, I had vague recollections of past research and quickly rediscovered Playwright’s built-in visual comparison feature. Because I try to select dependencies carefully, I was glad to see that Playwright seems not to rely on many external packages.
Setup
The recommended setup with npm init playwright@latest does a decent job, but my minimalist taste had me set everything up from scratch instead. This do-it-yourself approach also helped me understand how the different pieces fit together.
Given that I expect snapshot testing to only be used on rare occasions, I wanted to isolate everything in a dedicated subdirectory, called test/visual; that will be our working directory from here on out. We’ll start with package.json to declare our dependencies, adding a few helper scripts (spoiler!) while we’re at it:
"scripts": "test": "playwright test", "report": "playwright show-report", "update": "playwright test --update-snapshots", "reset": "rm -r ./playwright-report ./test-results ./viz.test.js-snapshots , "devDependencies": "@playwright/test": "^1.49.1"
If you don’t want node_modules hidden in some subdirectory but also don’t want to burden the root project with this rarely-used dependency, you might resort to manually invoking npm install --no-save @playwright/test in the root directory when needed.
With that in place, npm install downloads Playwright. Afterwards, npx playwright install downloads a range of headless browsers. (We’ll use npm here, but you might prefer a different package manager and task runner.)
We define our test environment via playwright.config.js with about a dozen basic Playwright settings:
import defineConfig, devices from "@playwright/test"; let BROWSERS = ["Desktop Firefox", "Desktop Chrome", "Desktop Safari"]; let BASE_URL = "http://localhost:8000"; let SERVER = "cd ../../dist && python3 -m http.server"; let IS_CI = !!process.env.CI; export default defineConfig( testDir: "./", fullyParallel: true, forbidOnly: IS_CI, retries: 2, workers: IS_CI ? 1 : undefined, reporter: "html", webServer: command: SERVER, url: BASE_URL, reuseExistingServer: !IS_CI , use: baseURL: BASE_URL, trace: "on-first-retry" , projects: BROWSERS.map(ua => ( name: ua.toLowerCase().replaceAll(" ", "-"), use: ...devices[ua] )) );
Here we expect our static website to already reside within the root directory’s dist folder and to be served at localhost:8000 (see SERVER; I prefer Python there because it’s widely available). I’ve included multiple browsers for illustration purposes. Still, we might reduce that number to speed things up (thus our simple BROWSERS list, which we then map to Playwright’s more elaborate projects data structure). Similarly, continuous integration is YAGNI for my particular scenario, so that whole IS_CI dance could be discarded.
Capture and compare
Let’s turn to the actual tests, starting with a minimal sample.test.js file:
import test, expect from "@playwright/test"; test("home page", async ( page ) => await page.goto("/"); await expect(page).toHaveScreenshot(); );
npm test executes this little test suite (based on file-name conventions). The initial run always fails because it first needs to create baseline snapshots against which subsequent runs compare their results. Invoking npm test once more should report a passing test.
Changing our site, e.g. by recklessly messing with build artifacts in dist, should make the test fail again. Such failures will offer various options to compare expected and actual visuals:
We can also inspect those baseline snapshots directly: Playwright creates a folder for screenshots named after the test file (sample.test.js-snapshots in this case), with file names derived from the respective test’s title (e.g. home-page-desktop-firefox.png).
Generating tests
Getting back to our original motivation, what we want is a test for every page. Instead of arduously writing and maintaining repetitive tests, we’ll create a simple web crawler for our website and have tests generated automatically; one for each URL we’ve identified.
Playwright’s global setup enables us to perform preparatory work before test discovery begins: Determine those URLs and write them to a file. Afterward, we can dynamically generate our tests at runtime.
While there are other ways to pass data between the setup and test-discovery phases, having a file on disk makes it easy to modify the list of URLs before test runs (e.g. temporarily ignoring irrelevant pages).
Site map
The first step is to extend playwright.config.js by inserting globalSetup and exporting two of our configuration values:
export let BROWSERS = ["Desktop Firefox", "Desktop Chrome", "Desktop Safari"]; export let BASE_URL = "http://localhost:8000"; // etc. export default defineConfig( // etc. globalSetup: require.resolve("./setup.js") );
Although we’re using ES modules here, we can still rely on CommonJS-specific APIs like require.resolve and __dirname. It appears there’s some Babel transpilation happening in the background, so what’s actually being executed is probably CommonJS? Such nuances sometimes confuse me because it isn’t always obvious what’s being executed where.
We can now reuse those exported values within a newly created setup.js, which spins up a headless browser to crawl our site (just because that’s easier here than using a separate HTML parser):
import BASE_URL, BROWSERS from "./playwright.config.js"; import createSiteMap, readSiteMap from "./sitemap.js"; import playwright from "@playwright/test"; export default async function globalSetup(config) // only create site map if it doesn't already exist try readSiteMap(); return; catch(err) // launch browser and initiate crawler let browser = playwright.devices[BROWSERS[0]].defaultBrowserType; browser = await playwright[browser].launch(); let page = await browser.newPage(); await createSiteMap(BASE_URL, page); await browser.close();
This is fairly boring glue code; the actual crawling is happening within sitemap.js:
createSiteMap determines URLs and writes them to disk.
readSiteMap merely reads any previously created site map from disk. This will be our foundation for dynamically generating tests. (We’ll see later why this needs to be synchronous.)
Fortunately, the website in question provides a comprehensive index of all pages, so my crawler only needs to collect unique local URLs from that index page:
function extractLocalLinks(baseURL) let urls = new Set(); let offset = baseURL.length; for(let href of document.links) if(href.startsWith(baseURL)) let path = href.slice(offset); urls.add(path); return Array.from(urls);
Wrapping that in a more boring glue code gives us our sitemap.js:
import readFileSync, writeFileSync from "node:fs"; import join from "node:path"; let ENTRY_POINT = "/topics"; let SITEMAP = join(__dirname, "./sitemap.json"); export async function createSiteMap(baseURL, page) await page.goto(baseURL + ENTRY_POINT); let urls = await page.evaluate(extractLocalLinks, baseURL); let data = JSON.stringify(urls, null, 4); writeFileSync(SITEMAP, data, encoding: "utf-8" ); export function readSiteMap() try var data = readFileSync(SITEMAP, encoding: "utf-8" ); catch(err) if(err.code === "ENOENT") throw new Error("missing site map"); throw err; return JSON.parse(data); function extractLocalLinks(baseURL) // etc.
The interesting bit here is that extractLocalLinks is evaluated within the browser context — thus we can rely on DOM APIs, notably document.links — while the rest is executed within the Playwright environment (i.e. Node).
Tests
Now that we have our list of URLs, we basically just need a test file with a simple loop to dynamically generate corresponding tests:
for(let url of readSiteMap()) test(`page at $url`, async ( page ) => await page.goto(url); await expect(page).toHaveScreenshot(); );
This is why readSiteMap had to be synchronous above: Playwright doesn’t currently support top-level await within test files.
In practice, we’ll want better error reporting for when the site map doesn’t exist yet. Let’s call our actual test file viz.test.js:
import readSiteMap from "./sitemap.js"; import test, expect from "@playwright/test"; let sitemap = []; try sitemap = readSiteMap(); catch(err) test("site map", ( page ) => throw new Error("missing site map"); ); for(let url of sitemap) test(`page at $url`, async ( page ) => await page.goto(url); await expect(page).toHaveScreenshot(); );
Getting here was a bit of a journey, but we’re pretty much done… unless we have to deal with reality, which typically takes a bit more tweaking.
Exceptions
Because visual testing is inherently flaky, we sometimes need to compensate via special casing. Playwright lets us inject custom CSS, which is often the easiest and most effective approach. Tweaking viz.test.js…
// etc. import join from "node:path"; let OPTIONS = stylePath: join(__dirname, "./viz.tweaks.css") ; // etc. await expect(page).toHaveScreenshot(OPTIONS); // etc.
… allows us to define exceptions in viz.tweaks.css:
/* suppress state */ main a:visited color: var(--color-link); /* suppress randomness */ iframe[src$="/articles/signals-reactivity/demo.html"] visibility: hidden; /* suppress flakiness */ body:has(h1 a[href="/wip/unicode-symbols/"]) main tbody > tr:last-child > td:first-child font-size: 0; visibility: hidden;
:has() strikes again!
Page vs. viewport
At this point, everything seemed hunky-dory to me, until I realized that my tests didn’t actually fail after I had changed some styling. That’s not good! What I hadn’t taken into account is that .toHaveScreenshot only captures the viewport rather than the entire page. We can rectify that by further extending playwright.config.js.
export let WIDTH = 800; export let HEIGHT = WIDTH; // etc. projects: BROWSERS.map(ua => ( name: ua.toLowerCase().replaceAll(" ", "-"), use: ...devices[ua], viewport: width: WIDTH, height: HEIGHT ))
…and then by adjusting viz.test.js‘s test-generating loop:
import WIDTH, HEIGHT from "./playwright.config.js"; // etc. for(let url of sitemap) test(`page at $url`, async ( page ) => checkSnapshot(url, page); ); async function checkSnapshot(url, page) // determine page height with default viewport await page.setViewportSize( width: WIDTH, height: HEIGHT ); await page.goto(url); await page.waitForLoadState("networkidle"); let height = await page.evaluate(getFullHeight); // resize viewport for before snapshotting await page.setViewportSize( width: WIDTH, height: Math.ceil(height) ); await page.waitForLoadState("networkidle"); await expect(page).toHaveScreenshot(OPTIONS); function getFullHeight() return document.documentElement.getBoundingClientRect().height;
Note that we’ve also introduced a waiting condition, holding until there’s no network traffic for a while in a crude attempt to account for stuff like lazy-loading images.
Be aware that capturing the entire page is more resource-intensive and doesn’t always work reliably: You might have to deal with layout shifts or run into timeouts for long or asset-heavy pages. In other words: This risks exacerbating flakiness.
Conclusion
So much for that quick spike. While it took more effort than expected (I believe that’s called “software development”), this might actually solve my original problem now (not a common feature of software these days). Of course, shaving this yak still leaves me itchy, as I have yet to do the actual work of scratching CSS without breaking anything. Then comes the real challenge: Retrofitting dark mode to an existing website. I just might need more downtime.
#:has#ADD#amp#APIs#approach#Article#Articles#background#browser#bugs#Capture#challenge#chrome#code#Color#command#comparison#comprehensive#content#continuous#continuous integration#course#CSS#css-tricks#dance#Dark#dark mode#data#deal#desktop
0 notes